Mar 2, 2014

Rigid and flexible molds for Polymer Clay

I use both rigid and flexible molds. Flex molds are becoming so popular and they are certainly easy and fun to use. One or the other may not necessarily be better  however. Depending on use, a rigid mold can sometimes give better and cleaner results. The rigidness of a mold allows for more control and prevents the design being molded from getting stretched and distorted. Flexible molds are great for when the item is rounded, like a button for instance. Rigid molds are impossible to use for a rounded object like a sea urchin that has a bit of a curved underside. In this example you can see the advantage of being able to stretch a mold to pop out a 3 D item, without distorting the curvature and details and you can virtually turn the mold inside out.
20140302230134(1)20140302230134(2)20140302230134(3)
Flexible molds do have their limitations however, in that it is difficult to create texture plates with them. If one has a large surface area to cover such as creating a 4 x 5 sheet, for example, it’s pretty much guaranteed that one will either end up with an unevenly textured piece, that is some areas will be more deeply impressed and others not enough and some of the details may look stretched. Even if one is successful in creating a texture plate with silicone rubber, creating a positive from such a large mold is difficult as the rubbery texture will shift and distort the image you are trying to copy. Another limitation with the flexible nature of such a mold is that if you are trying to create an equal front and back for a pendant, the stretchy nature of the mold might cause one to end up with 2 slightly different sized pieces.
Here is a short version tutorial on how to create a 2 sided item using a rigid mold.
clip_image002 Materials: 
  • Polymer clay such as Fimo which is my new /old preference, but you can use any of the polymer clay brands.
Tools:
  • · Tissue blade
  • · Rigid mold made from polymer clay
  • · Water
  • · Soft or absorbent brush, or small spray bottle for water
  • · Rubber chisel blending tool
  • · Needle tool
  • · Small metal spatula or exacto knife
  • · Texture such as coarse sandpaper or rough craft foam
  • · Small textured bead or stamp to hide seams
clip_image004 Step 1: Spritz or brush your mold with water. If you are going to use Fimo to cast from the mold, then do not use water as it will make the Fimo sticky. Use corn starch instead.
clip_image006 Step 2: Condition clay, roll into ball and press into the mold. Starting in centre of clay press outward to edges of mold.
clip_image008 Step 3: Use tissue blade starting at about centre of mold and slice away excess. Use the edges of mold as a horizontal blade guard or as an indicator of how much excess to trim. Hold the blade as horizontal as possible as not to slice into the mold. It’s kind of like slicing multi levels of colour clay for mokume gane.
clip_image010 Step 4: Turn the mold 180 degrees and slice away clay excess on other half.
clip_image012 Step 5: Using your thumbs, push the clay toward centre of mold or away from the edges of the mold.
clip_image014 Step 6: To remove the clay from the mold, press onto coarse sandpaper or a coarse craft foam texture.
clip_image016 Step 7: Mold should lift away, by causing the clay to stick onto the texture, but if it doesn’t…
clip_image018 Step 8: …you can also use a small metal spatula or needle tool to carefully lift the edges up and then the molded item is easier to remove.
clip_image020 Step 9: Create another piece as before and then mount the 2 pieces together matching the edges.
clip_image022 Step 10: With a rubber chisel tip you can easily blend and smooth seams. You can also use your fingertips to gently pinch the largest seam together first and then use the rubber chisel for the finer details.
clip_image024 Step 11: Seams won’t then have any of the texture. To camouflage you can create a similar texture by using the sandpaper to impress a little bit of texture over the seam, use part of the mold itself, or…
clip_image026 Step 12: If you have any metal beads with an interesting texture that matches, you can use this as a roller on the seam.
clip_image028 Step 13: This pendant is done. All it needs is a hole for stringing and a bit of colour. One of my favourite method is to use mica or metal pulver on black for an antique metal finish. Of course you can choose any colour you like.
Find my latest molds, both rigid and flexible in my Etsy shop
WWW.beadcomber.etsy.com

I’ve added a variety of molds to my shop including this Raven Thor Hammer Pendant mold. There is another hammer, a Sea Horse, Mermaid, Egyptian Themes and much more. I’ll be adding more tonight!

Feb 2, 2014

Spiky Elegance Bangle Bracelet Tutorial

I forgot to tell you about my latest tutorial! While it’s not persé a Polymer Clay tutorial it could certainly work with polymer clay beads! A while back I created faux rock spiky beads and used a shambala style clasp, that is with the macramé pull strings. The tutorial shows how to attach metal clasps and beadwork, but you could add the cord pull strings.

This is the initial bracelet I made with the polymer clay beads

DSC01483

And this is the Tutorial. It’s in all my shops, including Zibbet.

08-09-2013 spiky bracelets

Feb 1, 2014

Waterscape Jewellery

Currently one of the things I’m working on are some Waterscape Jewellery reminiscent of what I used to do in the early 90’s. Back then I called the popular miniature pieces ‘Underwater Scenes’ because they involved fish, octopus and other marine life. I created tiny pieces like coral, fauna, flora and fish from polymer clay and then mounted them on Hair barrettes, brooches, earrings, necklaces etc. Now I’m also creating scenes that take place above or on water that include lizards, frogs, and dragonflies. I just spent a few weeks making a variety of pieces and am told to prepare a bucket full, that these will sell well this season, but I also want to create each piece as a unique piece. Although tedious and a bit time-consuming, not only because of the small scale, but because of the multiple curing process in between elements, I do enjoy making these. Right now I’m contemplating putting away the clay and focus on completing some of these with cording, or beadwork such as bead-embroidery. The other part of me says to keep going with just a few more while the materials are out and on the go. Am thinking the later would keep the momentum going. That’s the downside of a small studio, not having enough desk or counter space to work on multiple things on the go or through the stages from start to finish, even though my husband keeps telling me I would have enough space if I didn’t clutter up my work areas so much. He’s probably right, but as an Artist I keep an ‘organized’ mess. I need to have a lot of materials in front of myself to keep the muse entertained, right?

DSC01456 DSC01454

DSC01453

DSC01458DSC01457

I have a couple new creatures to add, such as lizard, toad and dolphin…

Jan 20, 2014

Kick-starting 2014 with a Mini Tutorial …

Kind of a late kick-start, but it’s still January. With ‘everyone’ seemingly on Facebook now,  it’s easy to neglect ones Blog, but it is actually easier to navigate. One can search for a particular subject, keyword or even tutorial. Posts on Facebook get lost amongst all the posts from Friends in the Newsfeed. The benefit of a blog is that while it shows up on my FB wall, I’ll also have it here to refer back to. This year I strive to bring you more updates. I tinker around so much with stuff in my studio and do have so many tips to offer, but I just get so involved that I forget to show you! I need to re-evaluate how I spend my time, you may be able to relate, lol.  I also want to focus more on my Zibbet shop as my Etsy and ArtFire are well set up. My Zibbet is far less costly and we all appreciate some savings right? You may have heard about an Exodus from Etsy to Zibbet, but I don’t intend to give up on Etsy yet, as each shop has its own benefit. Enough said, I digress. Show me already! you say, lol. Okay, okay! The Mini Tutorial!

USB Cover!

I had thought of doing this last year, but never got around to it, but recently a clay friend inspired with her version, so I bought a bunch of USB sticks. Mine are by HP (Hewlett-Packard) which is my fave trusted brand for computer geekery. And these sticks are very small physically, but not so small when it comes to saving Data. I bought both 16 GB and 32 GB. I plan on listing some finished ones that I cover, like this one…a mere 1 1/2 inch tall. A cent for comparison. Cute eh? If you want to make some consider the shape as you won’t be able to cure the actual USB or you may ruin the delicate technology within.

DSC01442

This truly is a MINI Tutorial in regards to both size of finished product and steps involved. My paid tutorials go into much greater step by step description and photography meant for any level of ability. My minis are meant for those who can look at something and know how to get there without the steps in between.

DSC01429 DSC01438
From this… …to this and a regular USB stick for comparison.
DSC01443 DSC01447
Create a slab cut to same size as the mini USB and cure. This will be your USB template. Here you can also see the larger USB without its cap, to show how deep the USB part is that gets inserted into a laptop or computer. Score your blank for appropriate depth. Then use Armorall, Kato Repel Gel or Vaseline to coat your clay blank surface.

Cover top half of template to the score line with a clay sheet and cure both pieces together. When cool, the wrapped clay should simply slide off the template. Before removing (or mount back on) Use a cutting tool to score some shallow lines into the template.  The carved ‘inny’ lines on template will translate to little ‘outy’ lines to the cap and will grip the USB stick so the cap doesn’t just fall off.

DSC01445 DSC01448
Repeat last step,  for the cap, by using Armourall or Kato Repel etc…and then cure. Let cool and test fit on USB. Then decorate both pieces by adding more clay. Here is one of my examples. Glue the top part to the USB, but don’t glue the cap!

DSC01449

Going to hang this one on a pretty cord of sorts. I have a whole bunch more stuff to show you soon. Jewelry in the works and another Tutorial to publish tomorrow!!!

Oct 17, 2013

Time to let go and on to bigger things

Summer means a lot of production work, namely small pieces and quick sellers. It also happens I get asked for something more substantial but I don’t have a lot of time to spare during the busy season as beadembroidery takes several hours if not days, so I set aside Fall and Winter to work on that. I also intend to blog a bit more often.

The big destash. Time to let go of a few things, mainly my handmade components as I can’t use them all. I’ve already sold quite a few as I’m listing these at insanely low prices, $15 for a pack which means individual pieces are going for less than a Dollar and some for just cents. Normally I sell these between $5 and $15 a piece each. Why am I selling them and why for so little? Because I don’t have enough time to use them all, plus I continually make more than I can use. I also collect them with the intent to list and sell, but end up not having the time, and the box full grew and grew, so it’s time to start fresh. I kept a few pieces to create into beadembroidery (shown below) and the rest are now in my shop. If you enjoy beading you will enjoy these. What do they look like? Here are a few examples, but have a look in my Zibbet as there are close ups photos and better descriptions.

Mix 28Purples44 piecesmix 27

I’m planning 3 beadembroidered neck collars with matching earrings, maybe bracelets as well. I have sorted colours of beads to compliment the polymer clay cabochons. I’m not quite sure if I should add the amber glass to this Hawaiian Hibiscus? My husband thinks yes, what do you think?

DSC08581DSC08583

Then there is the Fuschia and Orange, and Turquoise with Green.

DSC08589DSC08579

I still need to destash other things, including molds, textures etc, but this will have to wait as I’m going on the road until end of November. I’ll take this netbook (and bead collars) with me, so I can blog and still send my PDF tutorials and show you some progress.

Sep 9, 2013

Fall is the time for new things

or is supposed to be. In my last post I told you about the unexpected renovations around here, but I still managed to get another couple of tutorials done. I also realize that I hadn’t even posted the one just before that, so should tell you about it also.

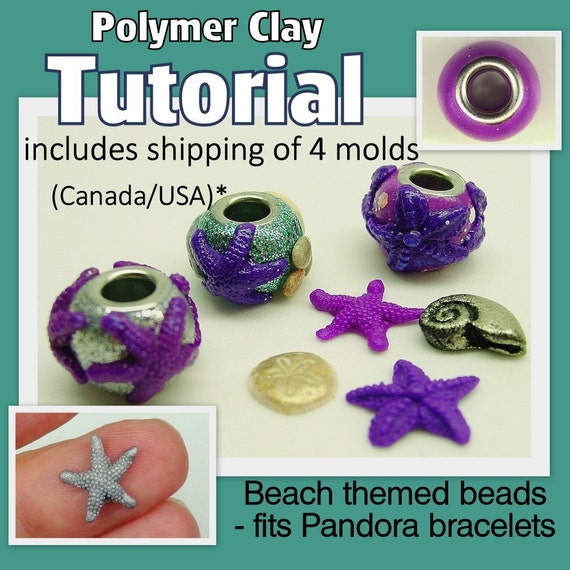
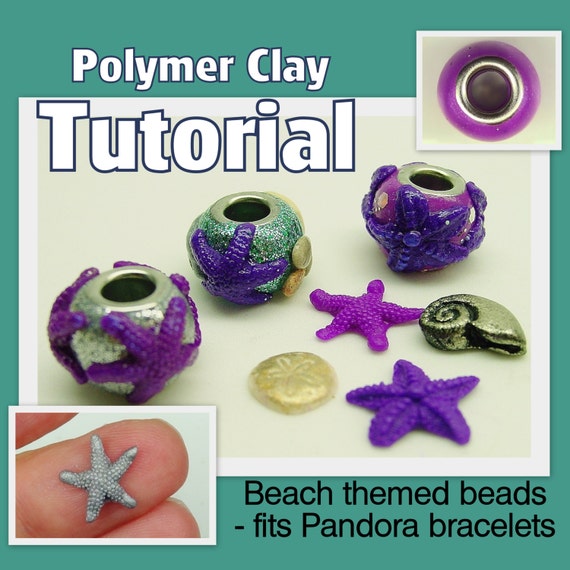
If you like Pandora, Pave, Panda or Beads with large holes and eyelets, I’ve created a Beach Themed bead that even comes with (or without) molds (your choice). The one with molds is $19 and includes shipping and the one without is $6. The molds are also available separately for those wishing to purchase but live outside of North America.


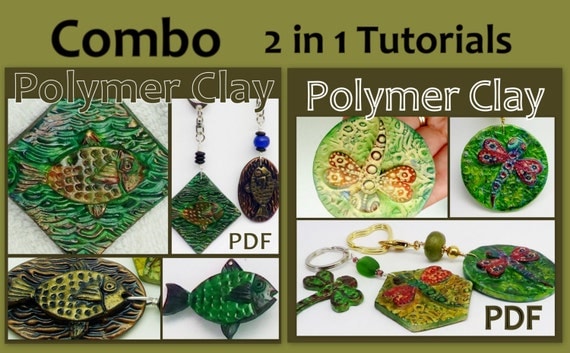
The newest tutorials are the Fish and Dragonfly tutorials. This is the Combo Tutorial for both. It’s only $14 for both, or $9 for the Dragonfly and $7 for the Fish.

These tutorials have a lot of information.

Make a small gift for the guys, someone that fishes for sport or just because! Or His and Hers key chains.
A variety of things in this tutorial: sculpting, molding, casting, painting with alcohol inks, gilding, and assemblage. First sculpt a Fish and a Dragonfly, and then create molds with backgrounds. Next, add a subtle and soft color, or another that is much bolder and vibrant. Some paints are optional but demonstrated. The projects here can be used for key fobs, pendants, pins, key chains or even box tops.


The Fish tutorial consists of 35 photographs, 38 steps, 12 pages, the Dragonfly has 49 photographs, 59 steps and 17 pages, both with a List of Tools and Materials, in 2 instant pdf file downloads. The precise instructions will guide you to create the projects outlined.
The PDF tutorials are Instant Downloadable files


© Tina Holden 2013
Beadcomber

Aug 27, 2013

Crazy Fogust

Foggy August equates to Fogust in this part of the world, but for our family it could be called the same for the blur of activity that went on and is going on. Right during the busiest time of our season a pipe in one of the bathrooms decided to burst.
flood
We woke up to a puddle in the kitchen, and a flood in the bathroom and hallway. The water had also seeped into our daughters bedroom and laundry room.  At first we thought the toilet had flooded and that our daughter who has Autism was trying to use the plunger, but it was quickly obvious that a simple leak was not the problem,  it turned out to be much bigger. The valve couldn’t be shut off because the break had occurred just below it. As our nice laminate floating floor began to blister it became obvious that we’d have to involve the Insurance. Water was being trapped between it and the original floor. Their first question was  “Is it Poly B?” They know it is a problem. In 2010 a class action lawsuit for $950million had been settled in Canada and the USA, but of course we were oblivious to that knowledge. Fixing this pipe would be at our own expense since the Insurance considers this a home maintenance problem, not ‘damage’ itself.

Insurance, assessment, repairs. Noisy fans, nights spent at hotels, no access to washer and dryer, no bedroom and respite room for our daughter, no access to her washroom, most of the furniture crammed into the living room, all during the busiest and most stressful time of the year. It’s been difficult to concentrate on work. Right now things are quiet and work should be completed by September 12th. We decided to pay extra and have our daughters room renovated with a floating laminate floor also, instead of carpeting,  plus hubby painted her ceiling while it sits empty. We also had a Plumber replace all the Poly B pipe to PEX which is a relief because we don’t want to risk another disaster. I feel for the people that have this plumbing in their home and don’t even know it. 

OH…and before I forget…I have a SALE in my Etsy shop. Until August 31, use SUMMERTIME2 for 20% off any purchase, no minimum required...if you miss it, use SUMMERTIME20 until Sept 21, but there is a $12 minimum.
The Sale...just because…

Aug 1, 2013

Reflections and Eyeglass holders

Now what may those two things have in common? Not much other than Reflections can be something one sees when looking in a mirror or when remembering the past. For me it’s the latter because today I received an email from my father who lives in Germany. We haven’t seen one another in many years and he told me he had been looking at some photos of when I had visited him in Germany in late1989, including this one, of when I first started to work with Fimo! Gosh…that is almost 24 years ago!! Perms…never again, lol. You might recognize some of the metal pulvers on the desk and the paper in the basket at my feet is a good indicator of the year. What was I working on…brooches. I’ll have to find that booklet I was using…or maybe create some of those pins again.

img077

Nice to think back to some good ol’ days.

So what was I working on over the last couple of days? Brooches…but of a different sort. I was asked by a local Gallery to make some eyeglass holders. Normally one would think of those long leashes worn as a necklace with the little rubber gasket type of ends. I made a few beaded ones, but then wanted to make some with polymer clay and came up with these since the Gallery likes my Ocean Themes. Sand dollars which can be worn either as a brooch or pin, but also as a necklace as the brooch findings have a loop for cord.

DSC08223DSC08228

DSC08225

Now that I made these I have even more ideas…back to the work table…

Jul 3, 2013

Shades of Turquoise

 
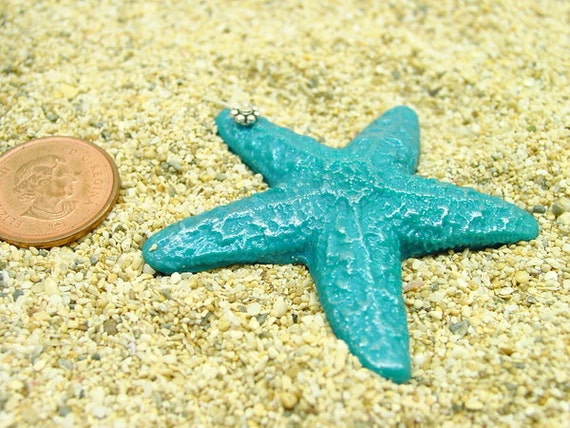
Today I mixed 4 shades of Turquoises in order to recreate one of my Starfish pendants I have for sale on Etsy. In my listing I used a hint to myself that it includes Turquoise and Peacock (Pearl) and when I used the recipe for it (2nd from left), quickly realized that it was the wrong 'hint'.

45mm turquoise peacock handmade Sea Star Pendant with daisy bail


 I searched and searched my notebook and couldn't find it...so attempted to just wing it...until I found it on my own blog! from when I created Pantone 2011 mixes.

I realize colours on monitors still vary, but which of the above do you think matches the starfish the best??

Posted by Picasa

May 19, 2013

International Polymer Clay Swaps on Facebook

Recently Updated9

There are many Art related Groups on Facebook including for Polymer Clay. Last Fall I created a Swap Group for trading our handmade themed Art.

You may ask that while this sounds like fun ‘what’s in it for me?’ What’s in it for the ‘established’ or even professional Artist? There are no short answers. To say ‘it’s fun’ is too general. There are many reasons why swapping may actually benefit you. Yes, benefit! But in short… It’s not just a ‘Gift Swap’ and you are trading with competent clayers.

More than 12 years ago when I joined a Canadian Yahoo Group called “Clayamies” we had a lot of fun sharing not only our knowledge with monthly lessons, but there was a weekly Monday night chat via MSN, we held virtual ‘Partays’ which included welcoming new members and celebrating birthdays. Close to Christmas we would celebrate Winterfest by sending a partner some kind of polymer clay related gift, then we’d all meet online at a chosen time, we’d write a wish on a piece of paper, burn it (so it would come true), open our gifts, chat and laugh. We also hosted a lot of swaps. The website is still up, so you can have a look around. I had hosted the bracelet swap in 2002, the Matchbox swap in 2004 and Beach Pebble swap in 2007, and also one of the Christmas Swaps, but can’t remember which year. swap a giftMost of the original members are now full-time artists or are pursuing other work/art and the group has become very quiet although the annual Christmas Swap still happens. I think the last swap I participated in was in 2008 mainly because I have many ornaments and don’t decorate so much now that our kids are grown and family is spread out far and wide.

Gift swap

Ok...so those are fond memories of swaps, but WHY create such a group on Facebook? Facebook has a lot of Polymer Clay related Groups and call it an epiphany…but I wanted to reach out to International Artists, to not just chat or show photos virtually about what we ‘do’ or how we make or what we sell, but what we can create and ‘share’ via snail-mail, by trading something handmade and then chat about it. I do think a lot of Artists are a bit afraid to join in a Swap. Afraid? Yes…I think it’s mostly the afraid of being disappointed. See that look? lol If THAT is YOUR fear…if you join our Group you will change your mind (you don’t have to participate in every swap, only if something interests you) The banner above shows a few examplesGift Disappointment

This is more like what we experience: Like!

like

Perhaps the professional artist worries being viewed as not being a ‘serious artist’ by participating in a swap. Or worried about being partnered with an individual who may not be up to their par? Or may even have the feeling that their item is worth too much for swapping? Valid fears, right? Really? STOP!!!…there already other Professional Artists that have taken that step before you and joined the Group. A more valid reason is that Artists may be too busy, but EVERYONE is busy. Yes, right now I’m overwhelmingly busy with wholesale orders, consignment orders, prepping for markets, preparing new tutorials, handling my Etsy/ArtFire, the Groups, my family, household as I still need to cook, clean, do laundry and the list goes on… and it’s taking me days to get to this post and it’s already nearly 2 a.m., lol . Ok, so even though we lead such busy lives, Swap THEMES are a GOOD creative diversion, not only from the repetitive

repetition 1

of the making and the selling of repeats, from the ‘must do’ and the ‘have to’, but it allows oneself to create more freely (in more that one way), it gives ones Muse ROOM to roam, if you will, instead of being imprisoned in that daily routine of things. We all try to fit in or have a niche which is important, but sometimes we just get lost in that maze…and things even though there is so much to do!…get stagnant.

repeat

How often do we ask ourselves when the repetitive ‘task or tasks are done “What new thing am I going to make now? I don’t feel inspired! I’m so busy, but this is boring to me!” This is because our Creative spirit and energy gets sapped and the tank runs dry by repeatedly doing the same things over and over. Sometimes our energy may be stuck, with only a few ideas that don’t ‘click’ and then we’re not quite sure HOW to take it to the next level. So, with being given the occasional

diversion road sign

with a challenge and a theme in hand, and the task of trading or swapping can open up a whole Valley to envision something new. Plus…you have almost a MONTH to get something made from sign up to mailing.

With our Group rules and guidelines… we must create something that we would WANT to have ourselves and then give it to a Partner who in turn gives us the same. Instead of just making something in a hurry, we are challenged to make it special, as if gifting our very best Friend. The bonus… we are making new Friends, not just Facebook Friends…(insert smile)

So, what kinds of Swaps have we done? I’ll give you our last Swap as an Example and what I traded with my Partner Ilenia Moreni who lives in Italy. Ilenia’s business and blog are Leggende Segrete which means Secret Legends. I think it’s very interesting that Ilenia is a Referee in Renaissance re-enactment fairs, very much like Lord of the Rings. For our Swap, the Theme was “Pens & Twinchies”. A Twinchie is an Art Tile that measures 2 inches square and is the larger version of an Inchie which measures 1 inch square. We recently decided that we’ll make this a collectible item within the Group and will include the making of a Twinchie with every Swap Theme. Here are the Twinchies we made for each other. I chose an Egyptian theme and Ilenia created an interesting fabric-like background with a cane slice, faux turquoise and bone.

Twinchie by Tina HoldenIlenia Moreni Twinchie

And these are the pens we created for each other.

Pen & Twinchie Swap Tina Holden 2013Ilenia Moreni Pen and Twinchie Swap

Past swaps include Window Ornaments, Fairy Doors, Hearts & Textures, and Journal Covers. Our Group is a closed Group which means one can join after accepting some guidelines and answering a short questionnaire. A new Swap is also starting with sign ups open until May 24th.The Theme is:

Recently Updated13

Perhaps you already received an invitation, but if not, find us here and request membership: https://www.facebook.com/groups/Polymerclayswaps/

To explain the theme…Fantasy Vessel: a container of sorts...your interpretation of Fantasy, whether it involves sculpting, caning or other technique as long as it is a 'container'. This may include covering a tin such as an Altoid or other metal tin or your own box made from multi-media (matchbox) and covered with clay, could include covering a locket, may have hinges, screw cap, snap lid etc. Should be no larger than a covered Altoid, but no smaller than a match box and may or may not involve a metal tin as long as it is 'sturdy'. And of course the Twinchie which I already explained.

Hope to see you there!

Related Posts Plugin for WordPress, Blogger...