Oct 17, 2013

Time to let go and on to bigger things

Summer means a lot of production work, namely small pieces and quick sellers. It also happens I get asked for something more substantial but I don’t have a lot of time to spare during the busy season as beadembroidery takes several hours if not days, so I set aside Fall and Winter to work on that. I also intend to blog a bit more often.

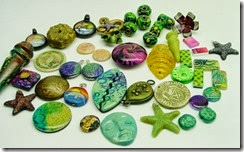
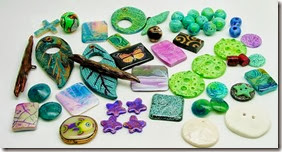
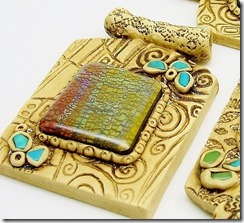
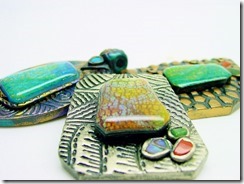
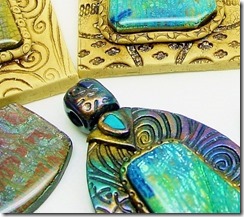
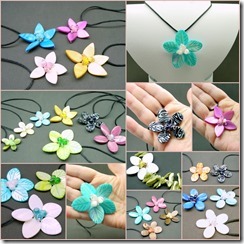
The big destash. Time to let go of a few things, mainly my handmade components as I can’t use them all. I’ve already sold quite a few as I’m listing these at insanely low prices, $15 for a pack which means individual pieces are going for less than a Dollar and some for just cents. Normally I sell these between $5 and $15 a piece each. Why am I selling them and why for so little? Because I don’t have enough time to use them all, plus I continually make more than I can use. I also collect them with the intent to list and sell, but end up not having the time, and the box full grew and grew, so it’s time to start fresh. I kept a few pieces to create into beadembroidery (shown below) and the rest are now in my shop. If you enjoy beading you will enjoy these. What do they look like? Here are a few examples, but have a look in my Zibbet as there are close ups photos and better descriptions.

Mix 28Purples44 piecesmix 27

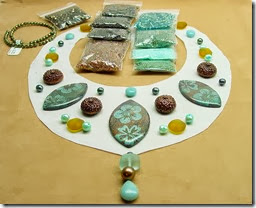
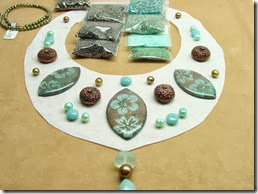
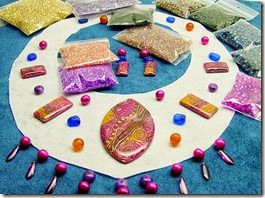
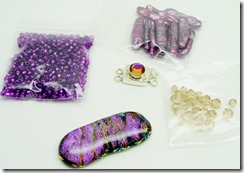
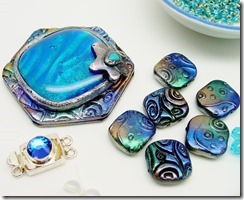
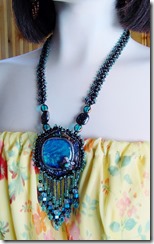
I’m planning 3 beadembroidered neck collars with matching earrings, maybe bracelets as well. I have sorted colours of beads to compliment the polymer clay cabochons. I’m not quite sure if I should add the amber glass to this Hawaiian Hibiscus? My husband thinks yes, what do you think?

DSC08581DSC08583

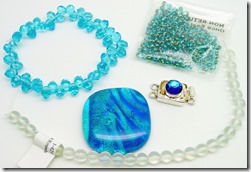
Then there is the Fuschia and Orange, and Turquoise with Green.

DSC08589DSC08579

I still need to destash other things, including molds, textures etc, but this will have to wait as I’m going on the road until end of November. I’ll take this netbook (and bead collars) with me, so I can blog and still send my PDF tutorials and show you some progress.

Sep 9, 2013

Fall is the time for new things

or is supposed to be. In my last post I told you about the unexpected renovations around here, but I still managed to get another couple of tutorials done. I also realize that I hadn’t even posted the one just before that, so should tell you about it also.

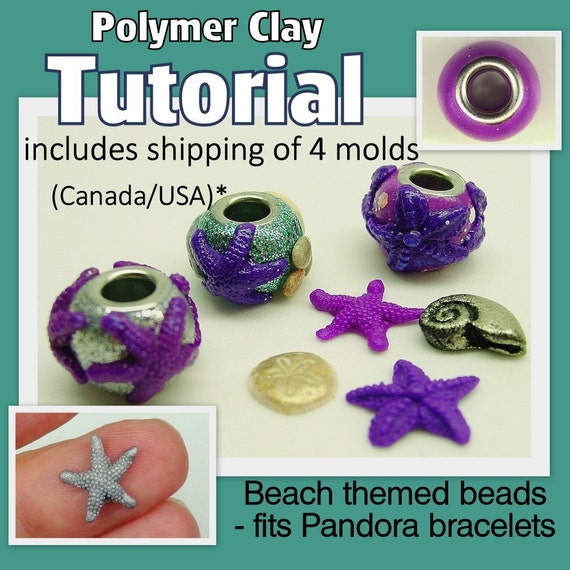
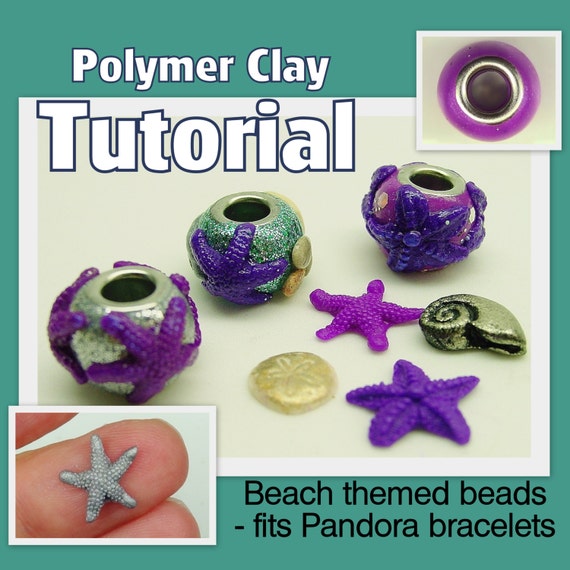
If you like Pandora, Pave, Panda or Beads with large holes and eyelets, I’ve created a Beach Themed bead that even comes with (or without) molds (your choice). The one with molds is $19 and includes shipping and the one without is $6. The molds are also available separately for those wishing to purchase but live outside of North America.


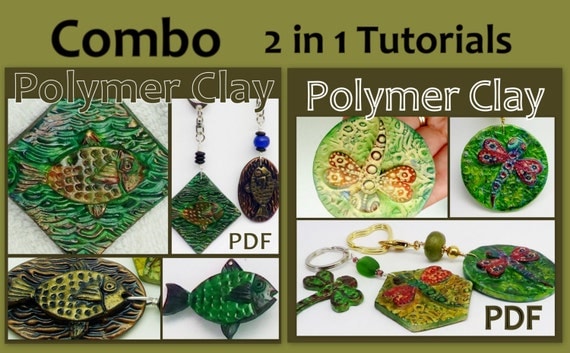
The newest tutorials are the Fish and Dragonfly tutorials. This is the Combo Tutorial for both. It’s only $14 for both, or $9 for the Dragonfly and $7 for the Fish.

These tutorials have a lot of information.

Make a small gift for the guys, someone that fishes for sport or just because! Or His and Hers key chains.
A variety of things in this tutorial: sculpting, molding, casting, painting with alcohol inks, gilding, and assemblage. First sculpt a Fish and a Dragonfly, and then create molds with backgrounds. Next, add a subtle and soft color, or another that is much bolder and vibrant. Some paints are optional but demonstrated. The projects here can be used for key fobs, pendants, pins, key chains or even box tops.


The Fish tutorial consists of 35 photographs, 38 steps, 12 pages, the Dragonfly has 49 photographs, 59 steps and 17 pages, both with a List of Tools and Materials, in 2 instant pdf file downloads. The precise instructions will guide you to create the projects outlined.
The PDF tutorials are Instant Downloadable files


© Tina Holden 2013
Beadcomber

Aug 27, 2013

Crazy Fogust

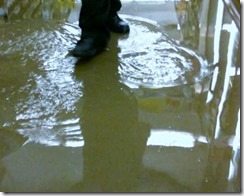
Foggy August equates to Fogust in this part of the world, but for our family it could be called the same for the blur of activity that went on and is going on. Right during the busiest time of our season a pipe in one of the bathrooms decided to burst.
flood
We woke up to a puddle in the kitchen, and a flood in the bathroom and hallway. The water had also seeped into our daughters bedroom and laundry room.  At first we thought the toilet had flooded and that our daughter who has Autism was trying to use the plunger, but it was quickly obvious that a simple leak was not the problem,  it turned out to be much bigger. The valve couldn’t be shut off because the break had occurred just below it. As our nice laminate floating floor began to blister it became obvious that we’d have to involve the Insurance. Water was being trapped between it and the original floor. Their first question was  “Is it Poly B?” They know it is a problem. In 2010 a class action lawsuit for $950million had been settled in Canada and the USA, but of course we were oblivious to that knowledge. Fixing this pipe would be at our own expense since the Insurance considers this a home maintenance problem, not ‘damage’ itself.

Insurance, assessment, repairs. Noisy fans, nights spent at hotels, no access to washer and dryer, no bedroom and respite room for our daughter, no access to her washroom, most of the furniture crammed into the living room, all during the busiest and most stressful time of the year. It’s been difficult to concentrate on work. Right now things are quiet and work should be completed by September 12th. We decided to pay extra and have our daughters room renovated with a floating laminate floor also, instead of carpeting,  plus hubby painted her ceiling while it sits empty. We also had a Plumber replace all the Poly B pipe to PEX which is a relief because we don’t want to risk another disaster. I feel for the people that have this plumbing in their home and don’t even know it. 

OH…and before I forget…I have a SALE in my Etsy shop. Until August 31, use SUMMERTIME2 for 20% off any purchase, no minimum required...if you miss it, use SUMMERTIME20 until Sept 21, but there is a $12 minimum.
The Sale...just because…

Aug 1, 2013

Reflections and Eyeglass holders

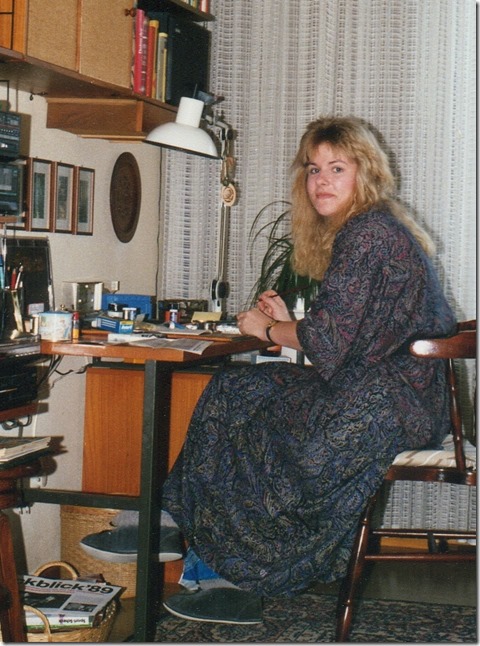
Now what may those two things have in common? Not much other than Reflections can be something one sees when looking in a mirror or when remembering the past. For me it’s the latter because today I received an email from my father who lives in Germany. We haven’t seen one another in many years and he told me he had been looking at some photos of when I had visited him in Germany in late1989, including this one, of when I first started to work with Fimo! Gosh…that is almost 24 years ago!! Perms…never again, lol. You might recognize some of the metal pulvers on the desk and the paper in the basket at my feet is a good indicator of the year. What was I working on…brooches. I’ll have to find that booklet I was using…or maybe create some of those pins again.

img077

Nice to think back to some good ol’ days.

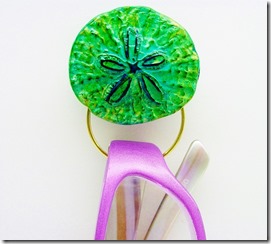
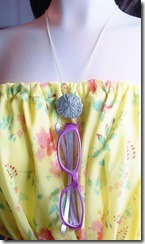
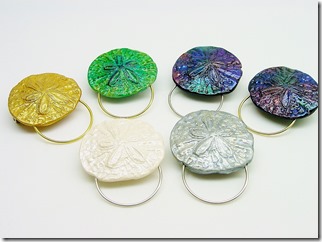
So what was I working on over the last couple of days? Brooches…but of a different sort. I was asked by a local Gallery to make some eyeglass holders. Normally one would think of those long leashes worn as a necklace with the little rubber gasket type of ends. I made a few beaded ones, but then wanted to make some with polymer clay and came up with these since the Gallery likes my Ocean Themes. Sand dollars which can be worn either as a brooch or pin, but also as a necklace as the brooch findings have a loop for cord.

DSC08223DSC08228

DSC08225

Now that I made these I have even more ideas…back to the work table…

Jul 3, 2013

Shades of Turquoise

 
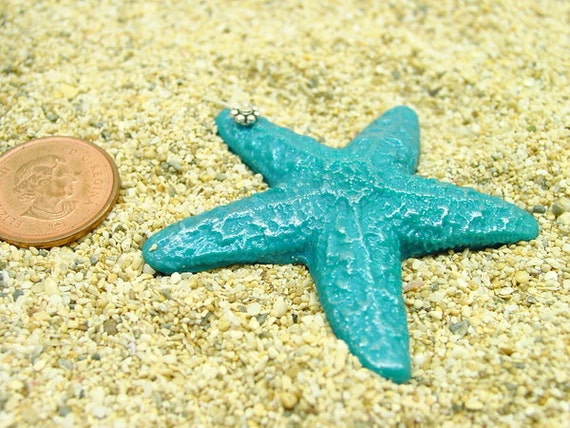
Today I mixed 4 shades of Turquoises in order to recreate one of my Starfish pendants I have for sale on Etsy. In my listing I used a hint to myself that it includes Turquoise and Peacock (Pearl) and when I used the recipe for it (2nd from left), quickly realized that it was the wrong 'hint'.

45mm turquoise peacock handmade Sea Star Pendant with daisy bail


 I searched and searched my notebook and couldn't find it...so attempted to just wing it...until I found it on my own blog! from when I created Pantone 2011 mixes.

I realize colours on monitors still vary, but which of the above do you think matches the starfish the best??

Posted by Picasa

May 19, 2013

International Polymer Clay Swaps on Facebook

Recently Updated9

There are many Art related Groups on Facebook including for Polymer Clay. Last Fall I created a Swap Group for trading our handmade themed Art.

You may ask that while this sounds like fun ‘what’s in it for me?’ What’s in it for the ‘established’ or even professional Artist? There are no short answers. To say ‘it’s fun’ is too general. There are many reasons why swapping may actually benefit you. Yes, benefit! But in short… It’s not just a ‘Gift Swap’ and you are trading with competent clayers.

More than 12 years ago when I joined a Canadian Yahoo Group called “Clayamies” we had a lot of fun sharing not only our knowledge with monthly lessons, but there was a weekly Monday night chat via MSN, we held virtual ‘Partays’ which included welcoming new members and celebrating birthdays. Close to Christmas we would celebrate Winterfest by sending a partner some kind of polymer clay related gift, then we’d all meet online at a chosen time, we’d write a wish on a piece of paper, burn it (so it would come true), open our gifts, chat and laugh. We also hosted a lot of swaps. The website is still up, so you can have a look around. I had hosted the bracelet swap in 2002, the Matchbox swap in 2004 and Beach Pebble swap in 2007, and also one of the Christmas Swaps, but can’t remember which year. swap a giftMost of the original members are now full-time artists or are pursuing other work/art and the group has become very quiet although the annual Christmas Swap still happens. I think the last swap I participated in was in 2008 mainly because I have many ornaments and don’t decorate so much now that our kids are grown and family is spread out far and wide.

Gift swap

Ok...so those are fond memories of swaps, but WHY create such a group on Facebook? Facebook has a lot of Polymer Clay related Groups and call it an epiphany…but I wanted to reach out to International Artists, to not just chat or show photos virtually about what we ‘do’ or how we make or what we sell, but what we can create and ‘share’ via snail-mail, by trading something handmade and then chat about it. I do think a lot of Artists are a bit afraid to join in a Swap. Afraid? Yes…I think it’s mostly the afraid of being disappointed. See that look? lol If THAT is YOUR fear…if you join our Group you will change your mind (you don’t have to participate in every swap, only if something interests you) The banner above shows a few examplesGift Disappointment

This is more like what we experience: Like!

like

Perhaps the professional artist worries being viewed as not being a ‘serious artist’ by participating in a swap. Or worried about being partnered with an individual who may not be up to their par? Or may even have the feeling that their item is worth too much for swapping? Valid fears, right? Really? STOP!!!…there already other Professional Artists that have taken that step before you and joined the Group. A more valid reason is that Artists may be too busy, but EVERYONE is busy. Yes, right now I’m overwhelmingly busy with wholesale orders, consignment orders, prepping for markets, preparing new tutorials, handling my Etsy/ArtFire, the Groups, my family, household as I still need to cook, clean, do laundry and the list goes on… and it’s taking me days to get to this post and it’s already nearly 2 a.m., lol . Ok, so even though we lead such busy lives, Swap THEMES are a GOOD creative diversion, not only from the repetitive

repetition 1

of the making and the selling of repeats, from the ‘must do’ and the ‘have to’, but it allows oneself to create more freely (in more that one way), it gives ones Muse ROOM to roam, if you will, instead of being imprisoned in that daily routine of things. We all try to fit in or have a niche which is important, but sometimes we just get lost in that maze…and things even though there is so much to do!…get stagnant.
repeat

How often do we ask ourselves when the repetitive ‘task or tasks are done “What new thing am I going to make now? I don’t feel inspired! I’m so busy, but this is boring to me!” This is because our Creative spirit and energy gets sapped and the tank runs dry by repeatedly doing the same things over and over. Sometimes our energy may be stuck, with only a few ideas that don’t ‘click’ and then we’re not quite sure HOW to take it to the next level. So, with being given the occasional

diversion road sign

with a challenge and a theme in hand, and the task of trading or swapping can open up a whole Valley to envision something new. Plus…you have almost a MONTH to get something made from sign up to mailing.

With our Group rules and guidelines… we must create something that we would WANT to have ourselves and then give it to a Partner who in turn gives us the same. Instead of just making something in a hurry, we are challenged to make it special, as if gifting our very best Friend. The bonus… we are making new Friends, not just Facebook Friends…(insert smile)

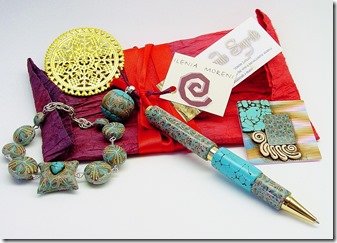
So, what kinds of Swaps have we done? I’ll give you our last Swap as an Example and what I traded with my Partner Ilenia Moreni who lives in Italy. Ilenia’s business and blog are Leggende Segrete which means Secret Legends. I think it’s very interesting that Ilenia is a Referee in Renaissance re-enactment fairs, very much like Lord of the Rings. For our Swap, the Theme was “Pens & Twinchies”. A Twinchie is an Art Tile that measures 2 inches square and is the larger version of an Inchie which measures 1 inch square. We recently decided that we’ll make this a collectible item within the Group and will include the making of a Twinchie with every Swap Theme. Here are the Twinchies we made for each other. I chose an Egyptian theme and Ilenia created an interesting fabric-like background with a cane slice, faux turquoise and bone.
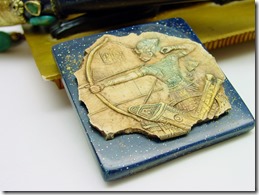
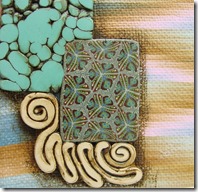
Twinchie by Tina HoldenIlenia Moreni Twinchie

And these are the pens we created for each other.
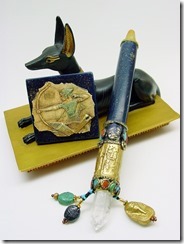
Pen & Twinchie Swap Tina Holden 2013Ilenia Moreni Pen and Twinchie Swap

Past swaps include Window Ornaments, Fairy Doors, Hearts & Textures, and Journal Covers. Our Group is a closed Group which means one can join after accepting some guidelines and answering a short questionnaire. A new Swap is also starting with sign ups open until May 24th.The Theme is:
Recently Updated13

Perhaps you already received an invitation, but if not, find us here and request membership: https://www.facebook.com/groups/Polymerclayswaps/

To explain the theme…Fantasy Vessel: a container of sorts...your interpretation of Fantasy, whether it involves sculpting, caning or other technique as long as it is a 'container'. This may include covering a tin such as an Altoid or other metal tin or your own box made from multi-media (matchbox) and covered with clay, could include covering a locket, may have hinges, screw cap, snap lid etc. Should be no larger than a covered Altoid, but no smaller than a match box and may or may not involve a metal tin as long as it is 'sturdy'. And of course the Twinchie which I already explained.

Hope to see you there!
May 11, 2013

Dragonscale Ammolite from Polymer Clay

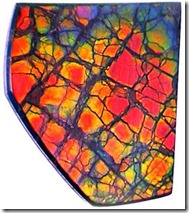
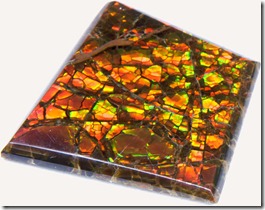
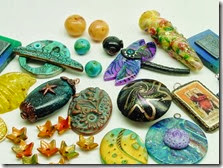
In late February I  published a new tutorial for Polymer Clay called Ammolite, Batik Veneers and Faux Bone Pendants. I love this material, but it is so very expensive that I wanted to make my own. Some of you may ask ‘But what is Ammolite?‘

Ammolite is the gemstone of the thin, iridescent opal-like layers of fossilized shells which are ammonites. Here are some more interesting facts. Lesser grades are the fractured Dragon skin like layers, more valued are opalescent sheets. Ammolites are from the Mesozoic Era, the time from about 250 million years ago to about 65 million years ago. It is often referred to as the Age of Reptiles, as in Dinosaurs.

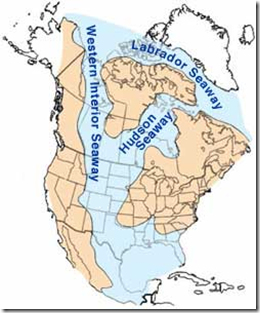
Ammolite is only found from Alberta to Saskatchewan in Canada and south to Montana in the USA. Ammonites that formed Ammolite, inhabited a prehistoric, inland subtropical sea that bordered the Appalachian Mountains—which is known today as the Cretaceous or Western Interior Seaway.

cretaceous seaway

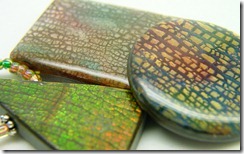
Some examples of Albertan Ammolite with the Dragon skin or scale like fractures. Colors range from golden amber, to rose, red, purple, blue and green.

Ammoliteammolite sample

DSC07572

Photos make it hard to tell as you cannot rotate the piece to see it from the different angles. I didn’t use any fractured gold leaf and it wouldn’t give quite the same effect.

DSC07577

DSC07586

DSC07959 (3)

DSC07965

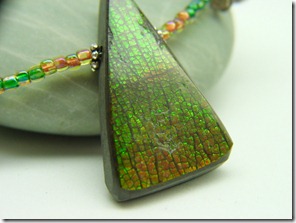
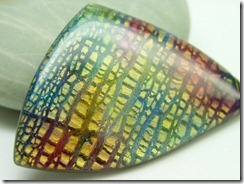
Quite often Jewelry grade Ammolite needs to be capped with a Crystal or Spinel, but I capped mine with resin as that also brings out the iridescence. Of course you can make other colour veneers that are just as beautiful and have a lot of dichroic effects. Of course capturing ‘metallic’ effects is difficult with a camera lens.

DSC07956

If you try it for yourself, you won’t be disappointed. Guess what I’m going to work on today, lol…yes, Ammolite. I need some earrings for those pendants. Have a great weekend!! (raining here today)
Apr 18, 2013

Spring and Summer Flower Pendants

Here we are past the mid April mark and I just heard it’s snowing in some parts of the Country. Here on the West Coast the Crocuses (also correct is Croci) are blooming and daffodils and tulips are also sprouting, although they seem a little late this year.

How about making your own colorful Flowers then? I’ve finally published my Flower Tutorial to both Etsy and ArtFire. The nice thing about Etsy, I’m participating in a Beta version of Instant Downloads. It’s not official yet, but I really like the convenience of not having to be on the computer all day long and hopefully my customers will appreciate being able to download the file/s right away.

Flower and Wire tutorial

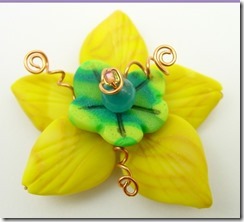
Isn’t this yellow one cute? I think we’re all ready for some color after a drab grey winter

Flower and Wire tutorial-001

If you don’t want to make your own petals, this tutorial also works for glass or shell beads like these pendants which I offer for sale as well

Recently Updated26

Apr 12, 2013

Bead Soup Blog Party–Reveal

I’m part of the BSBP 2nd Reveal. There are 500 participants and Lori Anderson split us into 3 Groups. My Partner is Jen Van Benschoten which I blogged about in a previous post. Here is a recap of what she sent me, my progress and my finished pieces.
Initially I wanted to make a fancy collar, but I’m pretty limited with time now that Spring is here. Also, I really only was required to do one piece, but Jen sent me 2 soups, so I went to work.

DSC07988DSC07989

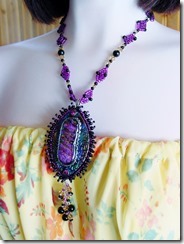
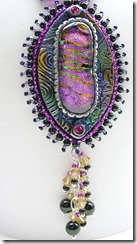
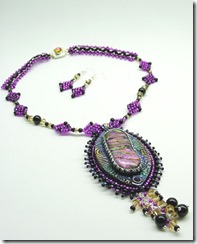
First I created pendants for the dichroic cabochons. I used black polymer clay with Pearlex mica. For the purple dichroic cabochon I created an almond shape, inlaid some magenta swarovski crystals, cured and varnished. For the blue dichroic cabochon I used a little turquoise chip inlaid in a polymer clay flower to hide the slight imperfection of missing dichroic background that is visible on the left side of the cabochon in the picture above. Maybe I’m too picky, but it bothered me a little. I also created some matching beads which I textured with some of my handmade textures.

Click on the pictures for larger versions.
DSC07991DSC07990

Then I used the size 8 magenta beads to surround the shape, along with black size 6’s from my stash and embroidered onto some Ultrasuede. I have to admit, the Japanese Stick pearls gave me trouble and I could not work them into this piece.

DSC08022DSC08000DSC08002

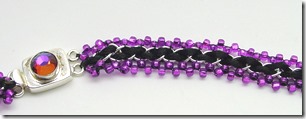
Isn’t the clasp beautiful? Even more in person because the Swarovski just sparkles. Jen was kind enough to give me the link for 'A Grain of Sand' so I could purchase some more of these. While they aren’t sterling silver, they are silver filled. I know there is such a thing as Gold-filled, but didn’t know that there was such a thing for Silver. I guess because of the increasing value of Silver, this had to happen.

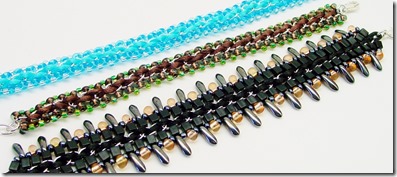
At first I only had the diamond shapes beaded and attached chain between them and the clasp, but it looked too sparse and empty. I couldn’t get my almond shape polymer clay beads to fit in either, so it hit me…and maybe, just maybe I came up with a new stitch…braiding cord through the chain and then beading the edges.

DSC08003

I ended up making a whole bunch of bracelets as I have a large roll of this chain and got hooked on stitching it…
DSC08030

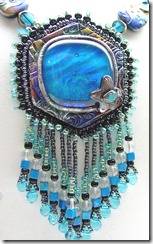
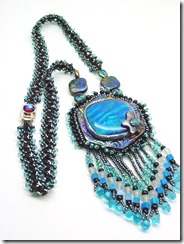
Getting back on topic…with the Blue necklace. Pendant is beaded like the Purple necklace, but made a beaded fringe with the Reconstituted moonstone beads and czech glass drops. Hey, I didn’t know they could reconstitute moonstone…mmm. I have a bunch of the real stuff and the reconstituted reminds me a lot of sea-opal which is a man-made moonstone type of glass. Anyway, I managed to fit in a couple of the polymer clay textured pillow beads and of course wove more chain.

DSC08018DSC08013DSC08016

What do you think? Did I succeed with these?
I’ll be posting these to a special Pinterest board where all the entries will be judged by a panel including Nina Designs, Lima Beads, Fusion Beads, PJ Tool and Jewelry, Beaducation, and Kalmbach Publishing. Not sure if I stand a chance to win one of the Prizes as there are some pretty amazing works on there already! I’ll be posting my entry after I hit ‘publish’ on this post here. The following link is the board…(wish me luck)
http://pinterest.com/limamike/contest-entries-for-bead-soup-blog-party-7/

These are so many  participants for the 2nd reveal. I tried copying and pasting the list, but my formatting won’t play along. You can see all the list on Lori’s blog.
http://lorianderson-beadsoupblogparty.blogspot.com/2013/04/7th-bead-soup-blog-party-2nd-reveal.html

and of course, please visit my Partner Jen Van Benschoten’s blog to see what she made with the beads I sent her!!
Related Posts Plugin for WordPress, Blogger...